How to Blow Dry Hair At Home
You know those hair adverts, the ones when they leave the salon in slow motion and their hair is bouncing like it has a life of its own? Well, I’m going to show you how to get that. Here are my secret at-home blow-dry tips.
I know you didn’t ask, but I feel like the world should know how to give themselves a banging blowdry at home, And want to know something even better? I’m giving away a bundle with everything you need to complete said blowdry, so head over to my Instagram before the 25th of September 2022 to enter 😉 @heyimbeks
Skip ahead 💇♀️
What Is A Blow Dry?
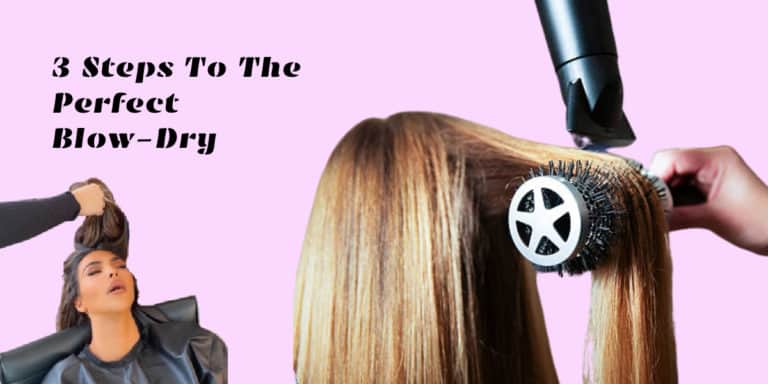
A blow-dry uses a hairdryer to apply hot air to damp hair, which leaves it soft, sleek and frizz-free. A texture that’s near impossible to create with air or natural drying.
What you’ll need:
- Hairdryer or hot brush
Make sure to use your blow dryer attachments
- Rollers
The reason we use rollers is that we really want to hold that volume in place for as long as possible
- Styling products
- Hairpins
- Round brush
Pick the right brush for your hair type. The reason we use a round brush is because we want to create volume at the root.
Step 1: What to Use Before Blow Drying Hair
You’ve washed your hair and conditioned the mid-lengths and ends, so it’s now time to pop your product in. Apply styling products (but sparingly). I always use Olaplex No 6 and 7 on my hair every time I wash it.
I then go in with my colour wow Xtra volume volumiser, I use 3 pumps and distribute this throughout my whole head, from roots to ends. Remember to apply styling products evenly through your hair. Always use a heat protectant.
Step 2: Blast drying.
You need to get your hair to 80% dry. Depending on what you prefer, You can start by either air drying or towel drying your hair, or like I do which is tipping my head upside down and blasting it with the hairdryer.
If you choose to air dry your hair, make sure you dry your hair using the right type of towel. For example, microfiber hair towels are less damaging to the hair and absorb more water than a standard towel.
If you are able to, I would recommend investing in a great blow dryer you can. Investing and choosing the right hair dryer will aid the blowdry in speeding up the process and making it smoother.
Step 3: The magic!
The golden rule is to always blow-dry in sections.
So I go in with my first section. I section from the middle of my ear and pin up the hair that’s above that level. This first section will be your base. So you can see in the tutorial that I have attached to this blog post, that I go in with my hairdryer and brush, and blow dry the hair with the brush underneath the hair, this is how you get the volume into the section, and once I’m happy that it is dry and have a good amount of volume, I then take the brush out and put the brush on top of your hair and blow dry it that way, so you can imagine it creates that flick.
Once I’ve done this a few times, I then pop my roller in ON TOP of the hair, this will set the hair in that “flick” shape. I then pin it with one of my pins. Complete these same steps for the rest of the section. Now for the next section, I’m going to do the same as the first section.
I’ve now done my first two sections, so it’s now time to move on to the next one. I part my hair into a horseshoe section, which you’ll see in the video. Now, these next two sections are going to be different, instead of going on top of the hair, the brush and roller will stay underneath the hair, as this is where I want the most lift. So you’ll place the brush under the hair, blow dry it until it’s dry and you are happy with the volume, and then you are going to put the roller under the hair and roll it up and then pin it to the head. Repeat all the way around.
Now we have reached our last section, depending on what you’ve got going on in the front, you may need to tweak it slightly. For example, I have bangs, so I roll mine going backwards (so the roller goes on top of the hair) With the back section I blowdry and pin it the same as the last section we did. But with my bangs, I blowdry the hair under and then flip the brush on top of the hair and blowdry backwards and then pop the roller in on top of the hair and pin.
Now I like to leave these in as long as possible, the longer you leave them in the longer it is going to last. I leave mine in whilst I do my makeup and get ready, so around two-ish hours.
So when it comes to removing them, just remove the pins and pull the rollers out, don’t mess with them until you have removed all the rollers. Now, once the rollers are removed, I play around with it until I’ve moulded it into the shape I like.
Go in with some texturising spray, I like the colour wow style on steroids spray, spray the crap out your hair and mess it up with your fingers to create more volumised hair, and your done!
Video tutorial of how to blow dry your hair at home
Whats Next?
The next step is to set your phone up on a tripod, give yourself plenty of room, and walk towards the camera in slow motion, to get that advert-worthy hair effect.
Bare in mind, that your haircut plays a huge part in the outcome of this blowdry, the more layers you have the bouncier you’ll be. The fewer layers you have, the less bouncy you’ll be.
PS, Head on over to my Instagram account @heyimbeks where you’ll find product reviews, general chitchat and a welcoming community